
 Hot Topics

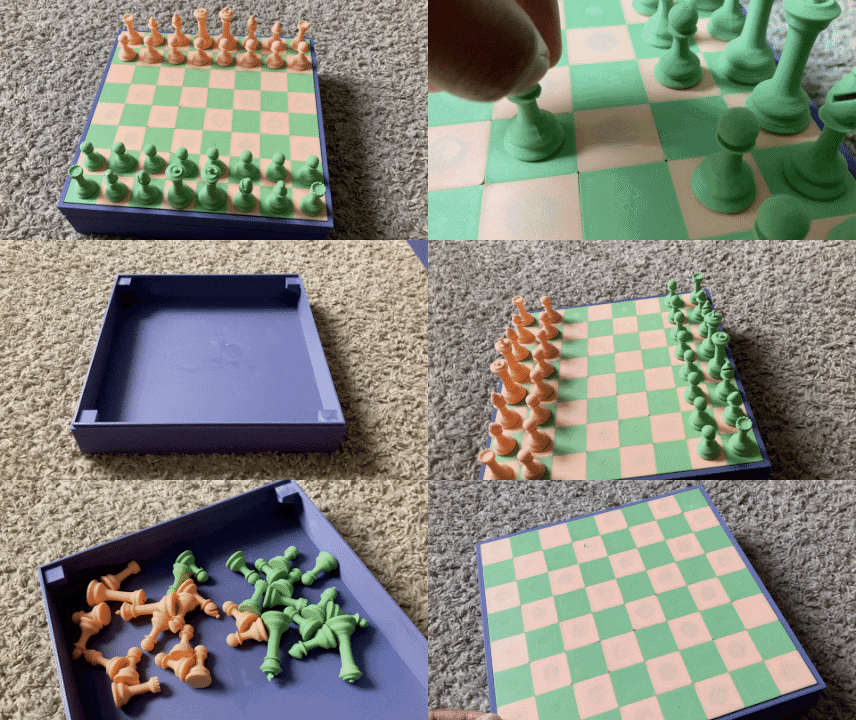
This is the promised post explaining the assembly of my Magnetic Chess Set.
As a disclaimer, this is a very difficult and very long project to assemble, primarily when the magnets are fastened inside of the board. 16+, I'd say. DO NOT LET YOUNG CHILDREN ASSEMBLE THIS UNSUPERVISED. Think of what could happen with a lot of magnets and a lot of glue...
In the model description, I've already explained that you'll need 10x2mm magnets, (I'd advise getting a set of 120 or more), some glue, gloves, any thin, non-metal item you can spare, and a whole lot of patience.
STEP 1: Once you have everything printed, sit it out in front of you. Make sure there is a bottom for every piece (2 Queen/King bases and 14 Pawn bases). You should also have 8 Magnet Covers. If you have your Board Base, Mid, and Top, you're good to go!
STEP 2: Take your Board Base and four Magnet covers. Take out your glue and four magnets as well. In the four corners of your Board Base, there will be a slot for your four magnets to go. Start on ONE CORNER. Place a magnet in any corner in any orientation. Put some glue directly on top of the magnet, and CAREFULLY place and magnet cover on top of it. Wait a few moments for the glue to set before continuing.
STEP 3: Once the glue is set, take another magnet and place it on top of the magnet cover. Since opposites attract, the side that is facing you after the magnets stick together is the same side that is facing upward in the first magnet. KEEPING THE MAGNET'S CURRENT FACE UPWARD, place it into the next magnet slot on the base. Place glue on the top of the magnet and put the magnet cover on top of it. Wait for the glue to set before proceeding to the next step. REPEAT THIS STEP FOR THE LAST TWO MAGNETS.
STEP 3: Take the Board Mid piece and the other four magnet covers. Get four more magnets and your glue. Place one magnet on one of the embedded magnets on your Board Base. Before removing it, make sure that your Board Mid piece is flipped over so that the four magnet slots are facing upward. Next, take the magnet on top of the embedded magnet in your Board Base. FLIP THAT MAGNET OVER SO THAT THE SIDE THAT STUCK TO THE BASE MAGNET IS FACING UPWARD. TRIPLE CHECK BEFORE placing the glue on top as before and putting the Magnet Cover on afterward. REPEAT FOR THE OTHER THREE MAGNETS BEFORE BEGINNING THE MOST LABORIOUS PART OF THE ASSEMBLY.
STEP 4: Take your Board Top, and as many magnets as you get. It's not worth counting out exactly 64 magnets and taking them out in a stack. THIS IS THE LONGEST AND MOST TEDIOUS STEP OUT OF THE PROCESS. BREAKS ARE ADVISED. Flip the Board Top overtop the side with all of the magnet slots. Place a little bit of glue to cover about half of the bottom of one of the corner slots. Place ONE magnet inside of the slot, and press down on it firmly with your thin, non-metal object. Take your next magnet and place it on the opposite side of the board. Find the first magnet's respective space on the chessboard, and the second magnet should stick to the first through the board. Pull out the second magnetic straight: the rule of opposites indicates that the side of the second magnet facing you should be the same side of the first magnet that is facing upward. Place the second magnet to the side, SAME FACE UP. Place some glue inside of the next slot. LIKE BEFORE, TRIPLE CHECK THAT THE SECOND MAGNET IS FACING THE CORRECT DIRECTION BEFORE PROCEEDING. Place the magnet some distance from the slot that you plan the place it in. Using a gloved finger and your non-metal tool, SLOWLY AND FIRMLY slide the magnet into the slot with the glue. MAKE SURE THAT THE MAGNET DOES NOT FLIP INSIDE OF THE SLOT. Wait a few seconds while firmly holding it in place with your non-metal tool then move on to the next magnet. REPEAT THIS PROCESS FOR THE REMAINING 62 MAGNETS. TAKE YOUR TIME AND AVOID ANY MISTAKES AT ALL COSTS.
IN THE EVENT THAT A MAGNET IS PLACED THE WRONG WAY OR IS PULLED INTO A SLOT THAT ALREADY HAS A MAGNET, CAREFULLY USE YOUR METAL 3D PRINTING SPATULA TO PRY IT OUT. BE AWARE OF WHERE YOUR FINGERS ARE; THE AMOUNT OF FORCE REQUIRED TO REMOVE THE MAGNET IS EASILY ENOUGH TO GIVE YOU A CUT OR SCRATCH. The process gets more difficult the more magnets that are added, and it is HIGHLY RECOMMENDED THAT YOU PLACE EACH MAGNET IN ORDER BY ROWS OR COLUMNS. Once all magnets are inserted and the glue is set, proceed to the next step.
STEP 5: Flip your Board Top to its other side. Assemble the Board by placing the Board Mid on top of the Board Base, magnets down. Place the Board Top in the square cutout on top of Board Mid, likewise magnets down.
STEP 6: Take a Queen/King base and place it on one of the board's spaces. Place a magnet on the slot in the base so that it sticks to the magnet embedded into the board below it. Place a small amount of glue. on the top of the magnet. Make sure it is enough to cover the top of the magnet and seep into the small space around the magnet. Place either the King piece on top, and firmly press it down until the glue hardens enough to keep the piece together on its own. Repeat for all the other pieces; all pieces but the King and Queen use the Pawn Bottom.
STEP 7: Place all of the pieces in their respective location on the board, and find someone to play Chess with. Make sure you've given all the glue enough time to set, though.
That's all for now. Let me know if you have any questions!
 Umplix



 Hot Activities